The usage of the Digi Grey is very simple. A child can do it:
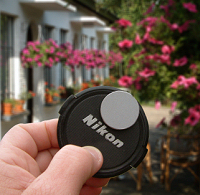
1. Photograph the Digi Grey at the time of making your photos. You photograph it in the scene or in front of the scene. That will be your reference photo. You do it once.
2. Make the same photo without the Digi Grey. And make your other photos as normal (without the Digi Grey too).
3. In your graphic software, use the tool "Black and White Point " or its equivalent ("Levels") on the grey of the Digi Grey of the reference photo.
4. The software immediately corrects the colours.
5. Apply this correction to the other photos (see here how proceeding with your software).
The Digi Grey is used with any digital camera whether simple or sophisticated.
To guarantee a good result, the Digi Grey must be in the same light as the subject to be photographed.
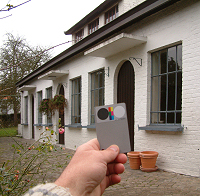
You place it near to the photographed subject, face grey out towards the camera. You can also hold it in the hand, at the end of arm, placed in front of the photographed subject as shown opposite. Use this method if the place where you are is lit in the same way as the subject which you photograph (landscape, building, etc.). If you are under shadow and if the photographed subject is in the sun, the Digi Grey must be photographed in the sun.
The photo made with the Digi Grey is considered as the reference photo. It is the grey colour of the Digi Grey visible on the photo which will serve as calibration.
You make then the other photos without the Digi Grey.
Even if your eyes perceive nothing abnormal, the camera could record the scene in a different way. It is the reason for which you are sometimes disappointed by photos made by your camera. You will use the Digi Grey as an assistant to retrieve the best colours. This assures your photos would be as beautiful as possible.
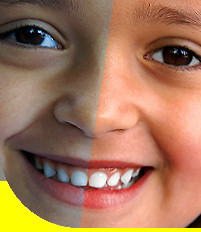
If you take portrait or familial photos, the Digi Grey guarantees correct skin tones.
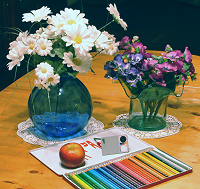
If you photograph objects whose colour must be strictly respected (textile, work of art, etc.), the Digi Grey is an indispensable accessory.
If by looking at your photos you are incapable to say if they have a correct colour or if you ignore how to make them better, use the Digi Grey. You will find exact colours thanks to the Digi Grey used in your graphic software. That is the software that does the job. As the software does the job, you don't need to have knowledge about colours theory, white balance, colour temperature, Kelvin degrees, how to move the colour cursors in the software, etc. It is easy because the Digi Grey and the software do the job for you.
The best result will be obtained from photos recorded in RAW format. But as the majority of the photos on the market are realized in JPG format, we chose to explain on this site how to use the Digi Grey in that case (JPG), with the most used cameras and the more known softwares used by everyone. The users of graphic softwares dedicated to the processing of photos in RAW format (Adobe Camera Raw, etc.) can naturally use the Digi Grey too and with perfect results.
How to correct colours with the Digi Grey.
|


