Levels Tool :
- Make a copy of the reference photo (the one where the Digi Grey is visible) and work on the copy. To make a copy, open the reference photo and save it under another name in the .bmp or .tif format (-> File - > Save as). To work on the copy is compulsory because if you modify your reference photo you cannot make any more correction with the Digi Grey.
- Open the copy of the reference photo.
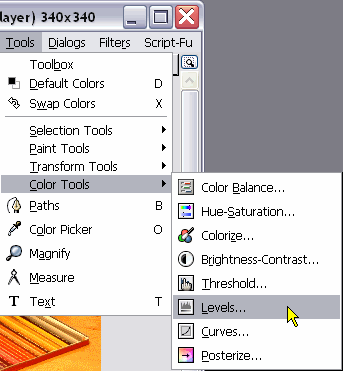
- Select the Levels Tool:
-> Tools
-> Colour Tools
-> Levels...:
- The Levels Tool displays as following:
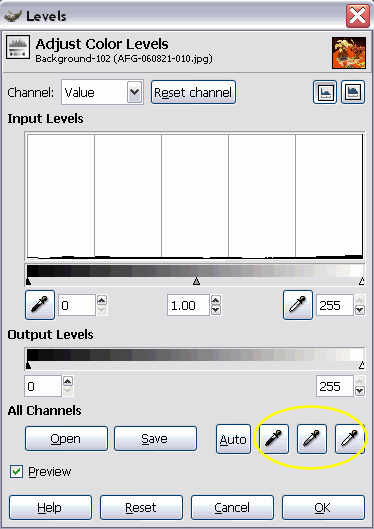
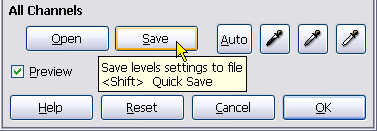
You will use the three droppers visible on the bottom right.
- Click on the "Black Point" dropper icon:
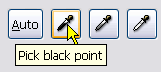
- Click on the grey of the Digi Grey in the reference photo:
- Click on the "Grey Point" dropper:
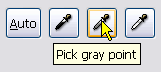
- Click on the grey area of the Digi Grey:

- At least, click on the white dropper:
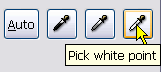
- And click on the white area of the Digi Grey:

- The result is the following :
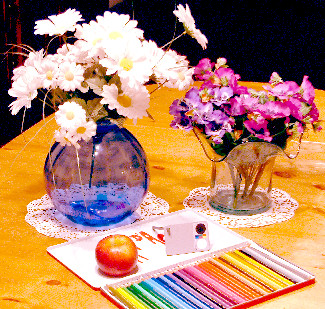
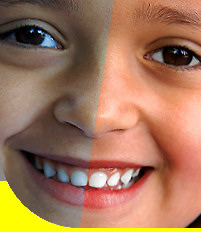
The image is too light and shows a red-magenta colour cast.
- We have observed that Gimp has difficulties to correct images with a strong colour cast. There is also a problem when using the droppers in a different order. The image is sometimes very faded. For exemple, if we process our orange photo example in the following order, black dropper, white dropper, grey dropper, the resulted image is completely unusable.
The best result we obtained was to use the droppers in the following sequence: gray, black and white:
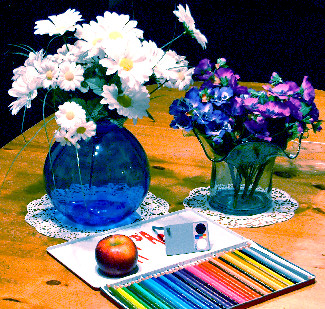
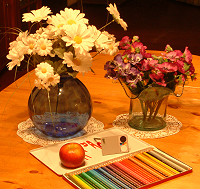
The obtained grey is still cyan (blue/green).
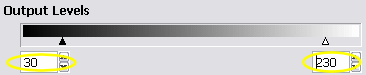
If you feel that the image is too contrasted, modify the out values after you have worked with the droppers:
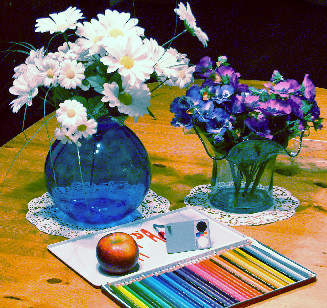
- The modification of those values produces a softer image. We see now more details in the white flowers, in the apple's shadow and in the blue flower vase:
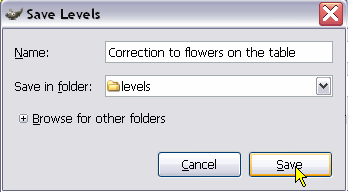
- Click on "Save" to put the adjustment in memory:
- Give a name to your Levels setting. Choose a folder of your hard drive where to place your setting and click on "Save":
- It is easy now to correct your other photos taken under the same lighting. Open them and click on the "Levels Tool". After that, load the setting made on the reference photo ("Open").
- The correction will be immediately visible. You need only to click on "OK" without the need to use the droppers:

- Do the same thing on your other photos.
- We have not found a possibility in Gimp to batch process automatically a colour correction on a group of photos.
Curves Tool :
A more precise correction is possible when using the Levels Tool. The method is explained here (in English):
http://www.outbackphoto.com/workflow/wf_65/essay.html
WhiteBalance Filter:
This filter works under Linux, Mac OS X and Windows.
Under Linux and Max OS, place it in the "scripts" folder : "~/.gimp-2.2/scripts/"
Under Windows, you will find the folder where to place it when doing:
-> Files
-> Preferences
-> Folders
-> Scripts
On my computer, I see it here:
C:\Program Files\Gimp\share\gimp\2.0\scripts
You place the filter there. Gimp needs to be closed before you do that.
Download the filter here :
http://www.dealfaro.com/~luca/code/whitebalance.html
If you make "Save as..." text file, it will have the .txt extension (whitebalance.scm.txt) that you will need to remove because Gimp recognizes only script files with the .scm extension.
Launch Gimp, open the reference image with the Digi Grey and click with the Dropper on the grey of the Digi Grey:

After that, do:
-> Filters
-> Colours
-> White balance
If you are not satisfied with the result made with the default values (100, 100, 0), do Ctrl+Z to undo and modify the values. To obtain the final result (see under), I have set the filter as following:
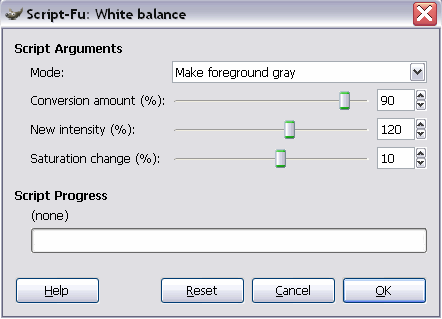
Click on "OK".
The result is the following, perhaps a little too warm but the default values produced some green-blue in the white flowers:

The applied adjusment stays in Gimp's memory. To correct the other images of the same group, open them and apply the filter on each.
My thanks to Luca de Alfaro ( http://www.dealfaro.com/home/ ) and François Guillier ( http://www.guillier.org/ ) for their help about this filter.
Plugin PowerRetouche :
You may also use in Gimp the free plugin PowerRetouche.
|