Levels Tool :
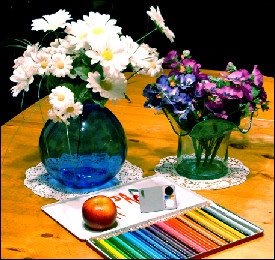
- Make a copy of the reference photo (the one where the Digi Grey is visible) and work on the copy. To make a copy, open the reference photo and save it under another name in the .psd, .bmp or .tif format (-> File - > Save as). To work on the copy is compulsory because if you modify your reference photo you cannot make any more correction with the Digi Grey.
- Open the copy of the reference photo
- The correcting method consist in correcting colours with an adjustment layer. After that, this layer will be copied on the other images that need to be processed.
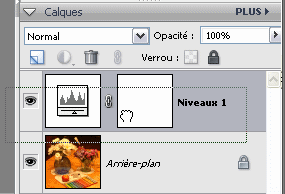
- Create a Levels layer :
-> Layer
-> New adjustment layer
-> Levels... :

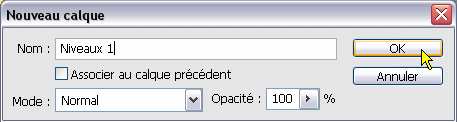
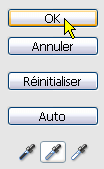
- Click on OK for creating the adjustment layer:
- The Levels Tool displays as following:
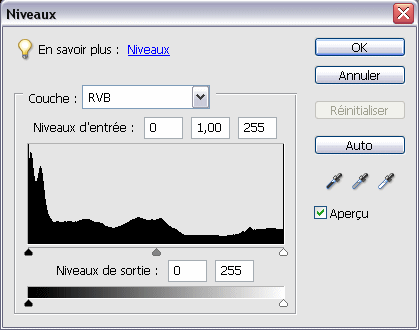
You will use the droppers visible on the right.
- Click on the grey dropper icon:
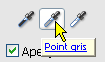
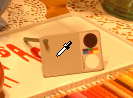
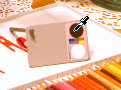
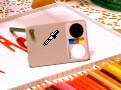
- With the dropper, click on the grey of the Digi Grey:
- Click on the white dropper icon:
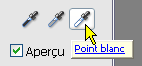
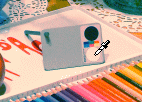
- Click on the white area of the Digi Grey:
- Click on the black dropper icon:
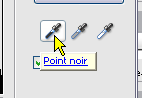
- Click on the black area of the Digi Grey:
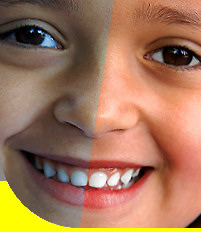
- The result is too red/magenta, perhaps because the color cast is too strong (heavy?) and Photoshop Elements is not able to correct it at once:
- Select one more time the grey dropper:
- Click with the dropper on the grey of the Digi Grey:
- The result is the following:
- To apply the correction, click on OK:
- To apply this setting to the other photos, let the reference photo open and open the other photos on the workspace.
- In the Layer Palette of the reference photo, click on the Levels adjustment layer, hold the mouse button down (the cursor transforms in a hand) and drag the layer on the image to correct:
- The photo that receives the adjustment layer will be corrected.
You may also use in Photoshop Elements the free plugin PowerRetouche.
|